环境配置
我使用的开发环境是:Win10x64+Anaconda+Pytorch1.3+PyCharm
1.获取Anaconda
anaconda官网:https://www.anaconda.com/distribution/
清华镜像网址:https://mirrors.tuna.tsinghua.edu.cn/anaconda/archive/
建议清华镜像网,下载速度更快。
选择最新的64位版本即可,安装过程中需要勾选添加环境变量。
安装最新anaconda同时会默认安装Python3.7。
2.使用anaconda安装pytorch
进入pytorch官网能够配置pytorch的安装方式:
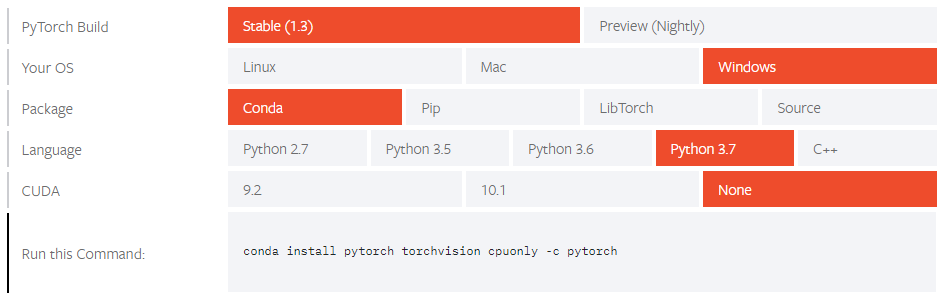
Package:选择 Conda,也就是第一步安装的工具包Anaconda; Language:选择 Python 3.7,因为Anaconda默认装了这个,就选这个; CUDA:选择 None,无GPU、或显卡为AMD选这个;如果是英伟达显卡需要额外安装cuda工具并配置好环境变量。
一般来说官方途径下载速度很慢,可按照下面的方法使用清华源:
cmd中依次输入如下命令添加清华conda源(3条命令):
1
2
3
conda config --add channels https://mirrors.tuna.tsinghua.edu.cn/anaconda/pkgs/free/
conda config --add channels https://mirrors.tuna.tsinghua.edu.cn/anaconda/pkgs/main/
conda config --set show_channel_urls yes
接着在cmd中运行pytorch官网的列出的命令,注意去掉-c pytorch才会从自定义的清华源进行获取。
3.测试验证pytorch
这里在cmd中打印下版本信息:
1
2
3
4
5
6
7
D:\>python
Python 3.7.x ...

Type "help", "copyright", "credits" or "license" for more information.
>>> import torch
>>> print(torch.__version__)
1.3.0
4.使用PyCharm
官网:http://www.jetbrains.com/pycharm/
PyCharm是一个Python IDE,简单的使用方法如下:
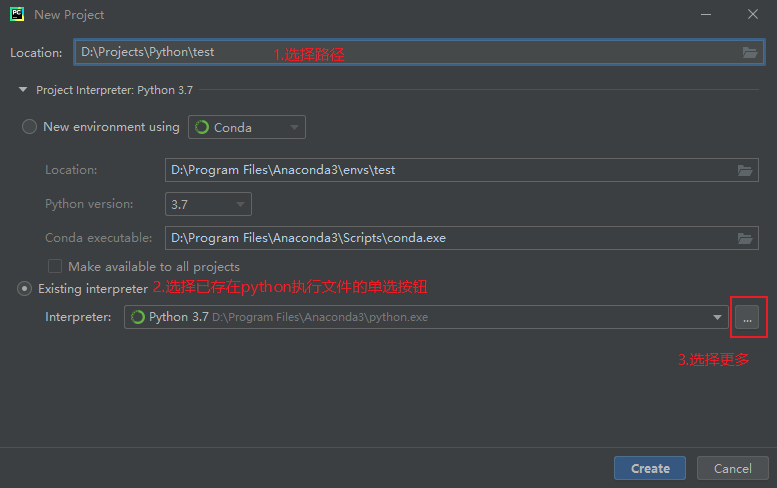
新建一个工程,进行配置python.exe:
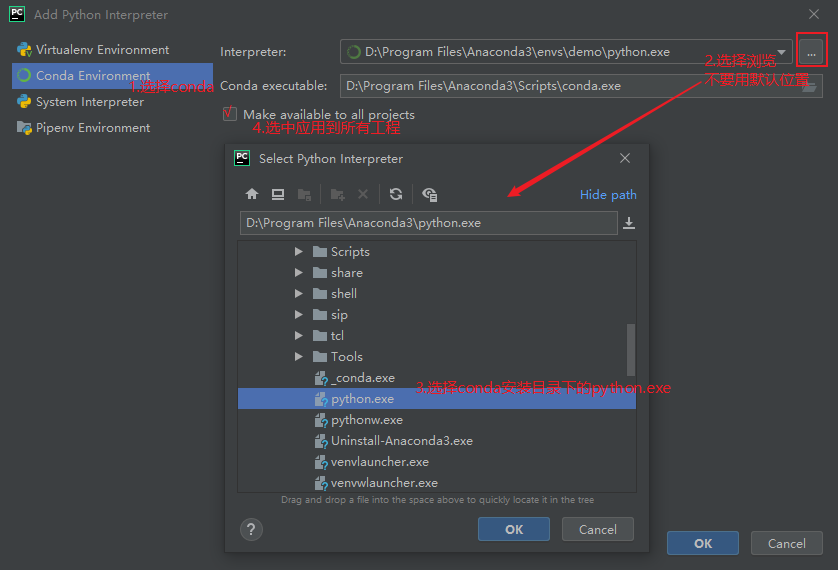
更新下默认conda下的interpreter为conda安装目录下的python.exe:
接着就可以新建第一个python程序了:
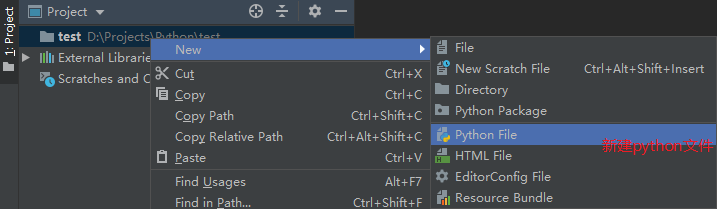
编写完成后,右键选择运行即可:
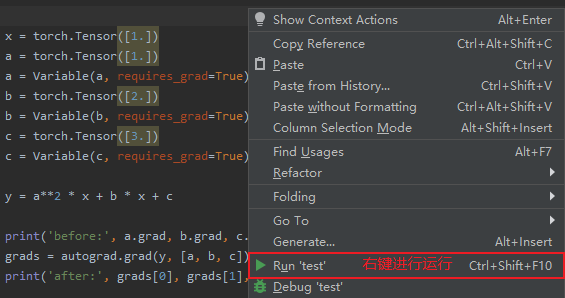
自动求导代码示例
这是第一个代码,主要求公式y = a^2*x + b*x + c中y分别对a、b、c的偏导数。
1
2
3
4
5
6
7
8
9
10
11
12
13
14
15
16
17
18
import torch
from torch import autograd              # torch 中 自动求导 模块
from torch.autograd import Variable     # torch 中 Variable 模块


x = torch.Tensor([1.])                 # 定义张量x
a = torch.Tensor([1.])
a = Variable(a, requires_grad=True)     # 表示可以对a求导
b = torch.Tensor([2.])
b = Variable(b, requires_grad=True)     # 表示可以对b求导
c = torch.Tensor([3.])
c = Variable(c, requires_grad=True)     # 表示可以对c求导

y = a**2 * x + b * x + c                # 定义公式 y = a^2*x + b*x + c

print('before:', a.grad, b.grad, c.grad)
grads = autograd.grad(y, [a, b, c])     # 开始求偏导,分别是2ax x 1,带入值就是2 1 1
print('after:', grads[0], grads[1], grads[2])
运行结果:

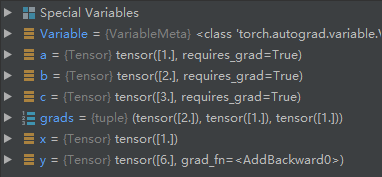
小提示:还可以使用右键“Run File in Python Console”,这样运行成功后右侧会出现变量窗格,用于调试和学习会很方便,但速度会慢很多。
运行在python控制台最后的结果会多出变量窗格: