下面主要介绍 VS2019 下单独编译库,以及在 Windows 平台构建测试工程,在多平台上验证;
libuv 库
单独编译库
下载地址:github
FetchContent 方式包含并使用库
工程文件结构如下:
1
2
3
4
5
6
7
8
9
.
├───out				# VS 的 cmake 工程输出目录
├───cmake			# cmake 模块脚本目录,存放 xxx.cmake 文件
		libuv2.cmake
├───ext				# 第三方库(如 libuv)存放目录,cmake 缓存时下载
├───include			# 头文件路径,当前为空
└───src
		main.cpp	# 主项目源文件
└───CMakeLists.txt	# 顶层目录的 cmake 脚本
main.cpp
1
2
3
4
5
6
7
8
9
10
11
12
13
14
15
16
#include <stdio.h>
#include <stdlib.h>
#include <uv.h>

int main(int argc, char *argv[])
{
    uv_loop_t *loop = (uv_loop_t *)malloc(sizeof(uv_loop_t));
    uv_loop_init(loop);

    printf("Now quitting.\n");
    uv_run(loop, UV_RUN_DEFAULT);

    uv_loop_close(loop);
    free(loop);
    return 0;
}
libuv2.cmake
fetchcontent_makeavailable 宏在 cmake 3.14 才得到支持;
1
2
3
4
5
6
7
8
9
10
# 指定远程仓库地址、版本,本地存放地址
# 如果 github 太慢,可用 gitee 代替
fetchcontent_declare(uv
	GIT_REPOSITORY https://github.com/libuv/libuv.git
	GIT_TAG v1.40.0
	SOURCE_DIR ${CMAKE_CURRENT_SOURCE_DIR}/ext/libuv
)
# 设置目标 CMakeLists.txt 中的选项,不编译库的附加程序
set(LIBUV_BUILD_TESTS OFF CACHE INTERNAL "")
fetchcontent_makeavailable(uv)
工程目录下 CMakeLists.txt:
1
2
3
4
5
6
7
8
9
10
11
12
13
14
15
16
17
18
19
20
21
22
23
24
25
26
27
28
29
30
31
32
33
34
# 设置 CMake 最低可用版本
cmake_minimum_required(VERSION 3.14)

# 设置工程名称和其他属性
project(libuv_demo CXX)

# 使用 fetchcontent
include(FetchContent)

# 设置版本为 c++11
set(CMAKE_CXX_STANDARD 11)

# 创建可执行程序项目
add_executable(libuv_demo src/main.cpp)

# 设定模块路径:当前目录 cmake 路径以及原本的模块路径
set(CMAKE_MODULE_PATH "${CMAKE_CURRENT_SOURCE_DIR}/cmake;${CMAKE_MODULE_PATH}")

# 引入 libuv2.camake(fetchcontent 方式)
include(libuv2)

# 链接库,使用 libuv
target_link_libraries(libuv_demo PRIVATE uv)

# 构建成功后复制依赖库到可执行程序所在目录
if (WIN32)
    add_custom_command(TARGET libuv_demo POST_BUILD
	    COMMAND ${CMAKE_COMMAND} -E copy ${CMAKE_BINARY_DIR}/_deps/uv-build/uv.dll ${CMAKE_BINARY_DIR}
    )
else ()
    add_custom_command(TARGET libuv_demo POST_BUILD
	    COMMAND cp ${CMAKE_BINARY_DIR}/_deps/uv-build/libuv.so ${CMAKE_BINARY_DIR}/libuv.so.1
    )
endif ()
Windows 使用结果:

Linux 使用结果:
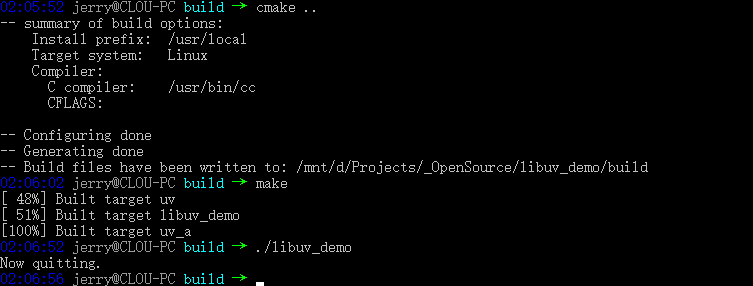
spdlog 库
单独编译库
下载地址:github
-
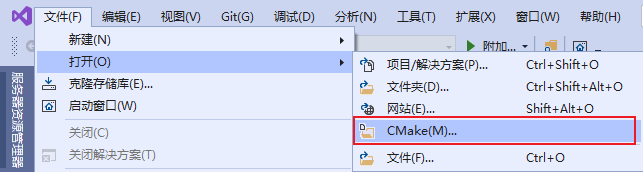
使用 VS2019 打开 spdlog 目录下的 CMakeLists.txt;
会在工程目录下多出 .vs 和 out 目录;
打开工程后,会自动按 x64-Debug 默认配置生成 cmake 缓存,默认路径在
out\build\${cfg_name}目录,然后 C++ IntelliSense 也会按照 cmake 缓存进行构建; -
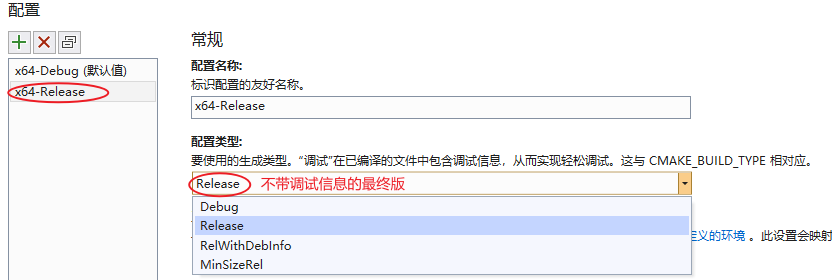
在解决方案资源管理器的 CMakeLists.txt 上右键 “CMake 设置”,新增一个 x64-Release 配置并保存;
会在工程目录下多出 CMakeSettings.json 文件;
-
选择 x64-Reelease 配置;

-
接着在解决方案资源管理器的 CMakeLists.txt 上右键 “生成”
最终在 out\build\x64-Release 目录下会生成我们的编译目标:

FetchContent 方式包含并使用库
工程文件结构如下:
1
2
3
4
5
6
7
8
9
.
├───out				# VS 的 cmake 工程输出目录
├───cmake			# cmake 模块脚本目录,存放 xxx.cmake 文件
		spdlog2.cmake
├───ext				# 第三方库(如 spdlog)存放目录,cmake 缓存时下载
├───include			# 头文件路径,当前为空
└───src
		main.cpp	# 主项目源文件
└───CMakeLists.txt	# 顶层目录的 cmake 脚本
main.cpp
1
2
3
4
5
6
7
#include <spdlog/spdlog.h>

int main(int argc, char *argv[])
{
	spdlog::info("I love c++");
	return 0;
}
spdlog2.cmake
fetchcontent_makeavailable 宏在 cmake 3.14 才得到支持;
1
2
3
4
5
6
7
8
9
10
# 指定远程仓库地址、版本,本地存放地址
# 如果 github 太慢,可用 gitee 代替
fetchcontent_declare(spdlog
	GIT_REPOSITORY https://github.com/gabime/spdlog.git
	GIT_TAG v1.8.2
	SOURCE_DIR ${CMAKE_CURRENT_SOURCE_DIR}/ext/spdlog
)
# 设置目标 CMakeLists.txt 中的选项,不编译库的附加程序
set(SPDLOG_BUILD_EXAMPLE OFF CACHE INTERNAL "")
fetchcontent_makeavailable(spdlog)
工程目录下 CMakeLists.txt:
1
2
3
4
5
6
7
8
9
10
11
12
13
14
15
16
17
18
19
20
21
22
23
# 设置 CMake 最低可用版本
cmake_minimum_required(VERSION 3.14)

# 设置工程名称和其他属性
project(spdlog_demo CXX)

# 使用 fetchcontent
include(FetchContent)

# spdlog 模块需要 c++11 及以上版本
set(CMAKE_CXX_STANDARD 11)

# 创建可执行程序项目
add_executable(spdlog_demo src/main.cpp)

# 设定模块路径:当前目录 cmake 路径以及原本的模块路径
set(CMAKE_MODULE_PATH "${CMAKE_CURRENT_SOURCE_DIR}/cmake;${CMAKE_MODULE_PATH}")

# 引入 spdlog2.camake(fetchcontent 方式)
include(spdlog2)

# 链接库,使用 spdlog
target_link_libraries(spdlog_demo PRIVATE spdlog::spdlog)
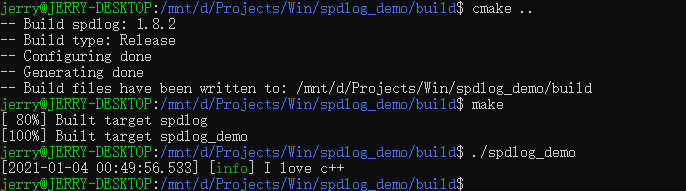
Windows 使用结果:

Linux 使用结果:
simpleini 库
编译
下载地址:github
simpleini 不需要编译为库文件,使用头文件即可;
使用
工程文件结构如下:
1
2
3
4
5
6
7
8
9
10
11
.
├───out				# VS 的 cmake 工程输出目录
├───ext				# 第三方库(如 SimpleIni)存放目录
	└───SimpleIni
			SimpleIni.h
			ConvertUTF.h
			ConvertUTF.c
├───include			# 头文件路径,当前为空
└───src
		main.cpp	# 主项目源文件
└───CMakeLists.txt	# 顶层目录的 cmake 脚本
main.cpp
1
2
3
4
5
6
7
8
9
10
11
12
13
14
15
16
17
18
19
20
21
#include <stdio.h>
#include "SimpleIni.h"

int main(int argc, char *argv[])
{
    CSimpleIniA ini;
    ini.SetUnicode();

    SI_Error rc = ini.LoadFile("myfile.ini");
	if (rc < 0) {
        printf("Can't load \"myfile.ini\"\n");
        return -1;
    }

    const char *pVal = ini.GetValue("section", "key", "default");
    printf("Key is %s\n", pVal);

    ini.SetValue("section", "key", "newvalue");
    ini.SaveFile("myfile.ini");
    return 0;
}
CMakeLists.txt
1
2
3
4
5
6
7
8
9
10
11
12
13
14
15
16
17
18
19
20
# 设置 CMake 最低可用版本
cmake_minimum_required(VERSION 3.14)

# 设置工程名称和其他属性
project(simpleini_demo CXX)

# 设置版本为 c++11
set(CMAKE_CXX_STANDARD 11)

# 头文件路径
message("include dir: " ${PROJECT_SOURCE_DIR}/ext/SimpleIni)
include_directories(${PROJECT_SOURCE_DIR}/ext/SimpleIni)

# 指定 SimpleIni 库的源文件
set(simpleini_src_file
	ext/SimpleIni/ConvertUTF.c
)

# 生成可执行文件
add_executable(simpleini_demo src/main.cpp ${simpleini_src_file})
测试使用的 myfile.ini 如下:
1
2
[section]
key = abc
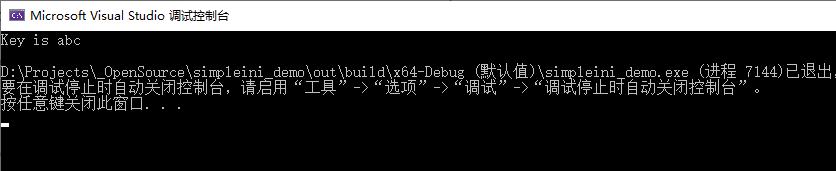
Windows 使用结果:
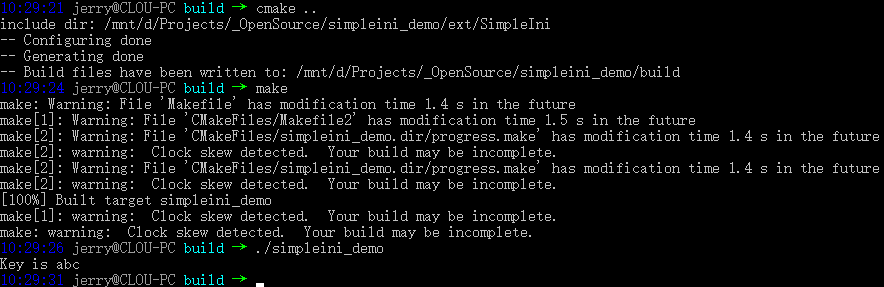
Linux 使用结果:
pugixml 库
单独编译库
下载地址:github
-
使用 VS2019 打开 pugixml 目录下的 CMakeLists.txt;
会在工程目录下多出 .vs 和 out 目录;
打开工程后,会自动按 x64-Debug 默认配置生成 cmake 缓存,默认路径在
out\build\${cfg_name}目录,然后 C++ IntelliSense 也会按照 cmake 缓存进行构建; -
在解决方案资源管理器的 CMakeLists.txt 上右键 “CMake 设置”,新增一个 x64-Release 配置并保存;
会在工程目录下多出 CMakeSettings.json 文件;
-
选择 x64-Reelease 配置;
-
接着在解决方案资源管理器的 CMakeLists.txt 上右键 “生成”
最终在 out\build\x64-Release 目录下会生成我们的编译目标:

FetchContent 方式包含并使用库
工程文件结构如下:
1
2
3
4
5
6
7
8
9
.
├───out				# VS 的 cmake 工程输出目录
├───cmake			# cmake 模块脚本目录,存放 xxx.cmake 文件
		pugixml2.cmake
├───ext				# 第三方库(如 pugixml)存放目录,cmake 缓存时下载
├───include			# 头文件路径,当前为空
└───src
		main.cpp	# 主项目源文件
└───CMakeLists.txt	# 顶层目录的 cmake 脚本
main.cpp
1
2
3
4
5
6
7
8
9
10
11
12
13
14
15
16
17
18
19
20
21
22
23
24
#include <stdio.h>
#include "pugixml.hpp"

int main(int argc, char *argv[])
{
    using namespace pugi;

    xml_document doc;
    xml_parse_result result = doc.load_file("myfile.xml");
    if (result.status != status_ok){
        printf("myfile.xml has an error XML format\n");
    }

    if (!doc.child("root"))
        doc.append_child("root");

    xml_node node = doc.child("root").child("ip");
    if (!node)
        doc.child("root").append_child("ip");

    node.text().set("10.10.10.10");
    doc.save_file("myfile.xml");
    return 0;
}
pugixml2.cmake
fetchcontent_makeavailable 宏在 cmake 3.14 才得到支持;
1
2
3
4
5
6
7
8
# 指定远程仓库地址、版本,本地存放地址
# 如果 github 太慢,可用 gitee 代替
fetchcontent_declare(pugixml
	GIT_REPOSITORY https://github.com/zeux/pugixml.git
	GIT_TAG v1.11.4
	SOURCE_DIR ${CMAKE_CURRENT_SOURCE_DIR}/ext/pugixml
)
fetchcontent_makeavailable(pugixml)
工程目录下 CMakeLists.txt:
1
2
3
4
5
6
7
8
9
10
11
12
13
14
15
16
17
18
19
20
21
22
23
# 设置 CMake 最低可用版本
cmake_minimum_required(VERSION 3.14)

# 设置工程名称和其他属性
project(pugixml_demo CXX)

# 使用 fetchcontent
include(FetchContent)

# 设置版本为 c++11
set(CMAKE_CXX_STANDARD 11)

# 创建可执行程序项目
add_executable(pugixml_demo src/main.cpp)

# 设定模块路径:当前目录 cmake 路径以及原本的模块路径
set(CMAKE_MODULE_PATH "${CMAKE_CURRENT_SOURCE_DIR}/cmake;${CMAKE_MODULE_PATH}")

# 引入 pugixml2.camake(fetchcontent 方式)
include(pugixml2)

# 链接库,使用 pugixml::pugixml
target_link_libraries(pugixml_demo PRIVATE pugixml::pugixml)
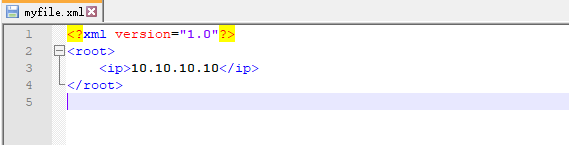
测试使用的 myfile.xml 如下:
1
2
3
4
<?xml version="1.0"?>
<root>
	<ip>192.168.1.1</ip>
</root>
Windows 使用结果,myfile.xml 文件被更新:
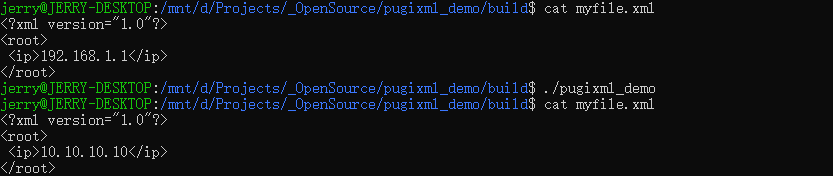
Linux 使用结果:
yaml-cpp 库
单独编译库
下载地址:github
-
使用 VS2019 打开 yaml-cpp 目录下的 CMakeLists.txt;
会在工程目录下多出 .vs 和 out 目录;
打开工程后,会自动按 x64-Debug 默认配置生成 cmake 缓存,默认路径在
out\build\${cfg_name}目录,然后 C++ IntelliSense 也会按照 cmake 缓存进行构建; -
在解决方案资源管理器的 CMakeLists.txt 上右键 “CMake 设置”,新增一个 x64-Release 配置并保存;
会在工程目录下多出 CMakeSettings.json 文件;
-
选择 x64-Reelease 配置;
-
接着在解决方案资源管理器的 CMakeLists.txt 上右键 “生成”
最终在 out\build\x64-Release 目录下会生成我们的编译目标:

FetchContent 方式包含并使用库
工程文件结构如下:
1
2
3
4
5
6
7
8
9
.
├───out				# VS 的 cmake 工程输出目录
├───cmake			# cmake 模块脚本目录,存放 xxx.cmake 文件
		yaml-cpp2.cmake
├───ext				# 第三方库(如 yaml-cpp)存放目录,cmake 缓存时下载
├───include			# 头文件路径,当前为空
└───src
		main.cpp	# 主项目源文件
└───CMakeLists.txt	# 顶层目录的 cmake 脚本
main.cpp
1
2
3
4
5
6
7
8
9
10
11
12
13
14
15
16
17
18
19
20
21
22
23
24
25
26
27
28
29
30
31
32
33
34
#include "yaml-cpp/yaml.h"
#include <iostream>

int main(int argc, char *argv[])
{
    YAML::Node root = YAML::LoadFile("myfile.yaml");

    /****************************
    - foo
    - primes: [2, 3, 5, 7, 11]
      odds: [1, 3, 5, 7, 9, 11]
    - [x, y]
    ****************************/

    std::cout << "myfile.yaml:" << std::endl;
    std::cout << root << std::endl;
    std::cout << std::endl;

    root[2].push_back(5);
    root[3] = "Hello, World";

    std::cout << root[0] << std::endl;              // "foo"
    std::cout << root[1]["primes"] << std::endl;    // "[2, 3, 5, 7, 11]"
    std::cout << root[1]["primes"][3] << std::endl; // "7"
    std::cout << root[2] << std::endl;              // "[x, y]"
    std::cout << root[3] << std::endl;              // "Hello, World"

    std::string s = root[0].as<std::string>();
    printf("s is %s\n", s.c_str());
    int i = root[1]["primes"][3].as<int>();
    printf("i is %d\n", i);

    return 0;
}
yaml-cpp2.cmake
fetchcontent_makeavailable 宏在 cmake 3.14 才得到支持;
1
2
3
4
5
6
7
8
9
10
11
12
13
14
# 指定远程仓库地址、版本,本地存放地址
# 如果 github 太慢,可用 gitee 代替
fetchcontent_declare(yaml
	GIT_REPOSITORY https://github.com/jbeder/yaml-cpp.git
	GIT_TAG yaml-cpp-0.6.3
	SOURCE_DIR ${CMAKE_CURRENT_SOURCE_DIR}/ext/yaml-cpp
)
# 设置目标 CMakeLists.txt 中的选项,不编译库的附加程序
set(YAML_CPP_BUILD_TESTS OFF CACHE INTERNAL "")
set(YAML_CPP_BUILD_TESTS OFF CACHE INTERNAL "")
set(YAML_CPP_BUILD_CONTRIB OFF CACHE INTERNAL "")
set(YAML_CPP_BUILD_TOOLS OFF CACHE INTERNAL "")
set(YAML_CPP_INSTALL OFF CACHE INTERNAL "")
fetchcontent_makeavailable(yaml)
工程目录下 CMakeLists.txt:
1
2
3
4
5
6
7
8
9
10
11
12
13
14
15
16
17
18
19
20
21
22
23
# 设置 CMake 最低可用版本
cmake_minimum_required(VERSION 3.14)

# 设置工程名称和其他属性
project(yaml_demo CXX)

# 使用 fetchcontent
include(FetchContent)

# 设置版本为 c++11
set(CMAKE_CXX_STANDARD 11)

# 创建可执行程序项目
add_executable(yaml_demo src/main.cpp)

# 设定模块路径:当前目录 cmake 路径以及原本的模块路径
set(CMAKE_MODULE_PATH "${CMAKE_CURRENT_SOURCE_DIR}/cmake;${CMAKE_MODULE_PATH}")

# 引入 yaml-cpp2.camake(fetchcontent 方式)
include(yaml-cpp2)

# 链接库,使用 yaml-cpp
target_link_libraries(yaml_demo PRIVATE yaml-cpp)
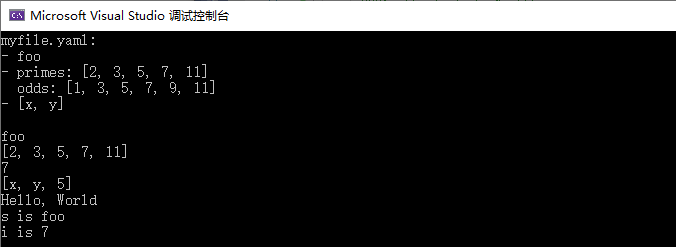
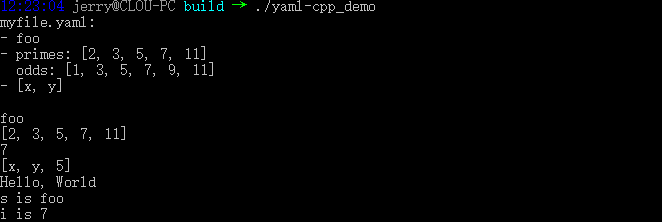
测试使用的 myfile.yaml 如下:
1
2
3
4
- foo
- primes: [2, 3, 5, 7, 11]
  odds: [1, 3, 5, 7, 9, 11]
- [x, y]
Windows 使用结果:
Linux 使用结果:
nlohmann_json 库
编译
下载地址:github
nlohmann_json 只有单个头文件;
FetchContent 方式包含并使用库
工程文件结构如下:
1
2
3
4
5
6
7
8
9
.
├───out				# VS 的 cmake 工程输出目录
├───cmake			# cmake 模块脚本目录,存放 xxx.cmake 文件
		nlohmann_json2.cmake
├───ext				# 第三方库(如 nlohmann_json)存放目录,cmake 缓存时下载
├───include			# 头文件路径,当前为空
└───src
		main.cpp	# 主项目源文件
└───CMakeLists.txt	# 顶层目录的 cmake 脚本
main.cpp
1
2
3
4
5
6
7
8
9
10
11
12
13
14
15
#include <iostream>
#include "nlohmann/json.hpp"
using json = nlohmann::json;

int main(int argc, char *argv[])
{
    json j;
    j.push_back("Hello");
    j.emplace_back("World");
    j += false;
    j[2] = 42.3;
    j[4] = "World";

    std::cout << j << std::endl;
}
nlohmann_json2.cmake
fetchcontent_makeavailable 宏在 cmake 3.14 才得到支持;
1
2
3
4
5
6
7
8
9
10
# 指定远程仓库地址、版本,本地存放地址
# 如果 github 太慢,可用 gitee 代替
fetchcontent_declare(json
	GIT_REPOSITORY https://github.com/nlohmann/json.git
	GIT_TAG v3.9.1
	SOURCE_DIR ${CMAKE_CURRENT_SOURCE_DIR}/ext/nlohmann_json
)
# 设置目标 CMakeLists.txt 中的变量,不编译库的测试程序
set(JSON_BuildTests OFF CACHE INTERNAL "")
fetchcontent_makeavailable(json)
工程目录下 CMakeLists.txt:
1
2
3
4
5
6
7
8
9
10
11
12
13
14
15
16
17
18
19
20
21
22
23
# 设置 CMake 最低可用版本
cmake_minimum_required(VERSION 3.14)

# 设置工程名称和其他属性
project(json_demo CXX)

# 使用 fetchcontent
include(FetchContent)

# 设置版本为 c++11
set(CMAKE_CXX_STANDARD 11)

# 创建可执行程序项目
add_executable(json_demo src/main.cpp)

# 设定模块路径:当前目录 cmake 路径以及原本的模块路径
set(CMAKE_MODULE_PATH "${CMAKE_CURRENT_SOURCE_DIR}/cmake;${CMAKE_MODULE_PATH}")

# 引入 nlohmann_json2.camake(fetchcontent 方式)
include(nlohmann_json2)

# 链接库,使用 nlohmann_json::nlohmann_json
target_link_libraries(json_demo PRIVATE nlohmann_json::nlohmann_json)
Windows 使用结果:

Linux 使用结果:

mosquitto 库
单独编译库
下载地址:官网
CMakeLists.txt 需要先配置下 option,否则编译不过,可以在 cmake 时传参也可以将下面的关闭配置放在脚本上方:
不建议按如下设置,新的编译步骤可以参考我的最新文档;
1
2
3
4
5
6
7
8
9
10
set(WITH_TLS OFF CACHE INTERNAL "")
set(WITH_UNIX_SOCKETS OFF CACHE INTERNAL "")
set(WITH_SOCKS OFF CACHE INTERNAL "")
set(WITH_THREADING OFF CACHE INTERNAL "")
set(WITH_LIB_CPP OFF CACHE INTERNAL "")
set(WITH_CLIENTS OFF CACHE INTERNAL "")
set(WITH_BROKER OFF CACHE INTERNAL "")
set(WITH_APPS OFF CACHE INTERNAL "")
set(WITH_PLUGINS OFF CACHE INTERNAL "")
set(DOCUMENTATION OFF CACHE INTERNAL "")
-
使用 VS2019 打开 CMake 工程;
-
接着在解决方案资源管理器的 CMakeLists.txt 上右键 “生成”,最终在 out\build\x64-Release\lib 目录下会生成我们的编译目标;

子工程方式包含并使用库
工程文件结构如下:
1
2
3
4
5
6
7
8
9
.
├───out				# VS 的 cmake 工程输出目录
├───ext				# 第三方库(如 mosquitto)存放目录,cmake 缓存时下载
	└───mosquitto	# mosquitto 库目录
			xxx		# mosquitto 库中文件
├───include			# 头文件路径,当前为空
└───src
		main.c		# 主项目源文件
└───CMakeLists.txt	# 顶层目录的 cmake 脚本
main.c
1
2
3
4
5
6
7
8
9
10
11
12
13
14
15
16
17
18
19
20
21
22
23
24
25
26
27
28
29
30
31
32
33
34
35
36
37
38
39
40
41
42
43
44
45
46
47
48
49
50
51
52
53
54
55
56
57
58
59
60
61
62
63
64
65
66
67
68
69
70
71
72
73
74
75
76
77
78
79
80
81
82
83
84
85
86
87
88
89
90
91
92
93
94
95
96
97
98
99
100
101
102
103
104
#include <stdio.h>
#include <stdlib.h>
#include <string.h>
#include "mosquitto.h"

#define HOST "localhost"
#define PORT  1883
#define KEEP_ALIVE 60
#define MSG_MAX_SIZE  512

// 定义运行标志决定是否需要结束
static int running = 1;

void my_connect_callback(struct mosquitto *mosq, void *obj, int rc)
{
	printf("Call the function: on_connect\n");

	if(rc){
		// 连接错误,退出程序
		printf("on_connect error!\n");
		exit(1);
	}else{
		// 订阅主题
		// 参数:句柄、id、订阅的主题、qos
		if(mosquitto_subscribe(mosq, NULL, "topic1", 2)){
			printf("Set the topic error!\n");
			exit(1);
		}
	}
}

void my_disconnect_callback(struct mosquitto *mosq, void *obj, int rc)
{
	printf("Call the function: my_disconnect_callback\n");
	running = 0;
}

void my_subscribe_callback(struct mosquitto *mosq, void *obj, int mid, int qos_count, const int *granted_qos)
{
	printf("Call the function: on_subscribe\n");
}

void my_message_callback(struct mosquitto *mosq, void *obj, const struct mosquitto_message *msg)
{
	printf("Call the function: on_message\n");
	printf("Recieve a message of %s : %s\n", (char *)msg->topic, (char *)msg->payload);

	if(0 == strcmp(msg->payload, "quit")){
		mosquitto_disconnect(mosq);
	}
}

int main(int argc, char *argv[])
{
	int ret;
	struct mosquitto *mosq;

	// 初始化mosquitto库
	ret = mosquitto_lib_init();
	if(ret){
		printf("Init lib error!\n");
		return -1;
	}

	// 创建一个订阅端实例
	// 参数:id(不需要则为NULL)、clean_start、用户数据
	mosq =  mosquitto_new("sub_test", true, NULL);
	if(mosq == NULL){
		printf("New sub_test error!\n");
		mosquitto_lib_cleanup();
		return -1;
	}

	// 设置回调函数
	// 参数:句柄、回调函数
	mosquitto_connect_callback_set(mosq, my_connect_callback);
	mosquitto_disconnect_callback_set(mosq, my_disconnect_callback);
	mosquitto_subscribe_callback_set(mosq, my_subscribe_callback);
	mosquitto_message_callback_set(mosq, my_message_callback);

	// 连接至服务器
	// 参数:句柄、ip(host)、端口、心跳
	ret = mosquitto_connect(mosq, HOST, PORT, KEEP_ALIVE);
	if(ret){
		printf("Connect server error!\n");
		mosquitto_destroy(mosq);
		mosquitto_lib_cleanup();
		return -1;
	}

	 // 开始通信:循环执行、直到运行标志running被改变
	printf("Start!\n");
	while(running)
	{
		mosquitto_loop(mosq, -1, 1);
	}

	// 结束后的清理工作
	mosquitto_destroy(mosq);
	mosquitto_lib_cleanup();
	printf("End!\n");

	return 0;
}
工程目录下 CMakeLists.txt:
1
2
3
4
5
6
7
8
9
10
11
12
13
14
15
16
17
18
19
20
21
22
23
24
25
26
27
28
29
30
31
32
33
34
35
# 设置 CMake 最低可用版本
cmake_minimum_required(VERSION 3.14)

# 设置工程名称和其他属性
project(mqtt_demo)

set(WITH_TLS OFF CACHE INTERNAL "")
set(WITH_UNIX_SOCKETS OFF CACHE INTERNAL "")
set(WITH_SOCKS OFF CACHE INTERNAL "")
set(WITH_THREADING OFF CACHE INTERNAL "")
set(WITH_LIB_CPP OFF CACHE INTERNAL "")
set(WITH_CLIENTS OFF CACHE INTERNAL "")
set(WITH_BROKER OFF CACHE INTERNAL "")
set(WITH_APPS OFF CACHE INTERNAL "")
set(WITH_PLUGINS OFF CACHE INTERNAL "")
set(DOCUMENTATION OFF CACHE INTERNAL "")
include_directories(ext/mosquitto/include)
add_subdirectory(ext/mosquitto)

# 创建可执行程序项目
add_executable(mqtt_demo src/main.c)

# 链接库,使用 libmosquitto
target_link_libraries(mqtt_demo PRIVATE libmosquitto)

# 构建成功后复制依赖库到可执行程序所在目录
if (WIN32)
    add_custom_command(TARGET mqtt_demo POST_BUILD
	    COMMAND ${CMAKE_COMMAND} -E copy ${CMAKE_BINARY_DIR}/ext/mosquitto/lib/mosquitto.dll ${CMAKE_BINARY_DIR}
    )
else ()
    add_custom_command(TARGET mqtt_demo POST_BUILD
	    COMMAND cp ${CMAKE_BINARY_DIR}/ext/mosquitto/lib/libmosquitto.so ${CMAKE_BINARY_DIR}/libmosquitto.so.1
    )
endif ()
Windows 使用结果:

Linux 使用结果:

FetchContent 方式包含并使用库
工程文件结构如下:
1
2
3
4
5
6
7
8
9
.
├───out				# VS 的 cmake 工程输出目录
├───cmake			# cmake 模块脚本目录,存放 xxx.cmake 文件
		mosquitto2.cmake
├───ext				# 第三方库(如 mosquitto)存放目录,cmake 缓存时下载
├───include			# 头文件路径,当前为空
└───src
		main.c		# 主项目源文件
└───CMakeLists.txt	# 顶层目录的 cmake 脚本
main.c
1
2
3
4
5
6
7
8
9
10
11
12
13
14
15
16
17
18
19
20
21
22
23
24
25
26
27
28
29
30
31
32
33
34
35
36
37
38
39
40
41
42
43
44
45
46
47
48
49
50
51
52
53
54
55
56
57
58
59
60
61
62
63
64
65
66
67
68
69
70
71
72
73
74
75
76
77
78
79
80
81
82
83
84
85
86
87
88
89
90
91
92
93
94
95
96
97
98
99
100
101
102
103
104
#include <stdio.h>
#include <stdlib.h>
#include <string.h>
#include "mosquitto.h"

#define HOST "localhost"
#define PORT  1883
#define KEEP_ALIVE 60
#define MSG_MAX_SIZE  512

// 定义运行标志决定是否需要结束
static int running = 1;

void my_connect_callback(struct mosquitto *mosq, void *obj, int rc)
{
	printf("Call the function: on_connect\n");

	if(rc){
		// 连接错误,退出程序
		printf("on_connect error!\n");
		exit(1);
	}else{
		// 订阅主题
		// 参数:句柄、id、订阅的主题、qos
		if(mosquitto_subscribe(mosq, NULL, "topic1", 2)){
			printf("Set the topic error!\n");
			exit(1);
		}
	}
}

void my_disconnect_callback(struct mosquitto *mosq, void *obj, int rc)
{
	printf("Call the function: my_disconnect_callback\n");
	running = 0;
}

void my_subscribe_callback(struct mosquitto *mosq, void *obj, int mid, int qos_count, const int *granted_qos)
{
	printf("Call the function: on_subscribe\n");
}

void my_message_callback(struct mosquitto *mosq, void *obj, const struct mosquitto_message *msg)
{
	printf("Call the function: on_message\n");
	printf("Recieve a message of %s : %s\n", (char *)msg->topic, (char *)msg->payload);

	if(0 == strcmp(msg->payload, "quit")){
		mosquitto_disconnect(mosq);
	}
}

int main(int argc, char *argv[])
{
	int ret;
	struct mosquitto *mosq;

	// 初始化mosquitto库
	ret = mosquitto_lib_init();
	if(ret){
		printf("Init lib error!\n");
		return -1;
	}

	// 创建一个订阅端实例
	// 参数:id(不需要则为NULL)、clean_start、用户数据
	mosq =  mosquitto_new("sub_test", true, NULL);
	if(mosq == NULL){
		printf("New sub_test error!\n");
		mosquitto_lib_cleanup();
		return -1;
	}

	// 设置回调函数
	// 参数:句柄、回调函数
	mosquitto_connect_callback_set(mosq, my_connect_callback);
	mosquitto_disconnect_callback_set(mosq, my_disconnect_callback);
	mosquitto_subscribe_callback_set(mosq, my_subscribe_callback);
	mosquitto_message_callback_set(mosq, my_message_callback);

	// 连接至服务器
	// 参数:句柄、ip(host)、端口、心跳
	ret = mosquitto_connect(mosq, HOST, PORT, KEEP_ALIVE);
	if(ret){
		printf("Connect server error!\n");
		mosquitto_destroy(mosq);
		mosquitto_lib_cleanup();
		return -1;
	}

	 // 开始通信:循环执行、直到运行标志running被改变
	printf("Start!\n");
	while(running)
	{
		mosquitto_loop(mosq, -1, 1);
	}

	// 结束后的清理工作
	mosquitto_destroy(mosq);
	mosquitto_lib_cleanup();
	printf("End!\n");

	return 0;
}
mosquitto2.cmake
fetchcontent_makeavailable 宏在 cmake 3.14 才得到支持;
1
2
3
4
5
6
7
8
9
10
11
12
13
14
15
16
17
18
19
20
# 指定远程仓库地址、版本,本地存放地址
# 如果 github 太慢,可用 gitee 代替
fetchcontent_declare(mqtt
	GIT_REPOSITORY https://github.com/eclipse/mosquitto.git
	GIT_TAG v2.0.4
	SOURCE_DIR ${CMAKE_CURRENT_SOURCE_DIR}/ext/mosquitto
)
# 设置目标 CMakeLists.txt 中的变量,不编译库的测试程序
set(WITH_TLS OFF CACHE INTERNAL "")
set(WITH_UNIX_SOCKETS OFF CACHE INTERNAL "")
set(WITH_SOCKS OFF CACHE INTERNAL "")
set(WITH_THREADING OFF CACHE INTERNAL "")
set(WITH_LIB_CPP OFF CACHE INTERNAL "")
set(WITH_CLIENTS OFF CACHE INTERNAL "")
set(WITH_BROKER OFF CACHE INTERNAL "")
set(WITH_APPS OFF CACHE INTERNAL "")
set(WITH_PLUGINS OFF CACHE INTERNAL "")
set(DOCUMENTATION OFF CACHE INTERNAL "")
fetchcontent_makeavailable(mqtt)
include_directories(ext/mosquitto/include)
工程目录下 CMakeLists.txt:
1
2
3
4
5
6
7
8
9
10
11
12
13
14
15
16
17
18
19
20
21
22
23
24
25
26
27
28
29
30
31
# 设置 CMake 最低可用版本
cmake_minimum_required(VERSION 3.14)

# 设置工程名称和其他属性
project(mqtt_demo)

# 使用 fetchcontent
include(FetchContent)

# 创建可执行程序项目
add_executable(mqtt_demo src/main.c)

# 设定模块路径:当前目录 cmake 路径以及原本的模块路径
set(CMAKE_MODULE_PATH "${CMAKE_CURRENT_SOURCE_DIR}/cmake;${CMAKE_MODULE_PATH}")

# 引入 mosquitto2.camake(fetchcontent 方式)
include(mosquitto2)

# 链接库,使用 libmosquitto
target_link_libraries(mqtt_demo PRIVATE libmosquitto)

# 构建成功后复制依赖库到可执行程序所在目录
if (WIN32)
    add_custom_command(TARGET mqtt_demo POST_BUILD
	    COMMAND ${CMAKE_COMMAND} -E copy ${CMAKE_BINARY_DIR}/_deps/mqtt-build/lib/mosquitto.dll ${CMAKE_BINARY_DIR}
    )
else ()
    add_custom_command(TARGET mqtt_demo POST_BUILD
	    COMMAND cp ${CMAKE_BINARY_DIR}/_deps/mqtt-build/lib/libmosquitto.so ${CMAKE_BINARY_DIR}/libmosquitto.so.1
    )
endif ()
Windows 使用结果:
Linux 使用结果: