写在前面
先看文章
一些环境
- wsl2 ubuntu22.04(已经升级 wslg);
- linux kernel 使用 5.19.6 版本;
运行方式
qemu 运行 vmlinux(debug 版本),然后通过 vscode+gdb 来调试 linux 内核源码;
调试流程
编译 linux 内核
-
安装依赖工具:
1
sudo apt install build-essential gdb flex bison libssl-dev libelf-dev libncurses-dev -y
-
下载内核源码:
1
wget https://cdn.kernel.org/pub/linux/kernel/v5.x/linux-5.19.6.tar.xz
-
进入配置页面:
1
2
3
4
5
6
7
xz -d linux-5.19.6.tar.xz
tar -vxf linux-5.19.6.tar
cd linux-5.19.6

export ARCH=x86
make x86_64_defconfig
make menuconfig
-
配置内核:
“Default RAM disk size (kbytes)” 需要按照最终制作的 ramdisk 大小进行设置,这里设置为 65536;
1 2 3 4 5 6 7 8 9 10 11 12 13 14 15 16 17 18 19 20 21 22 23
General setup ---> [*] Initial RAM filesystem and RAM disk (initramfs/initrd) support Device Drivers ---> [*] Block devices ---> <*> RAM block device support (65536) Default RAM disk size (kbytes) Processor type and features ---> [*] Randomize the address of the kernel image (KASLR) Kernel hacking ---> Compile-time checks and compiler options ---> Debug information (Rely on the toolchain's implicit default DWARF version) [*] Provide GDB scripts for kernel debugging Device Drivers --> Network device support --> <*> Universal TUN/TAP device driver support [*] Networking support --> Networking options --> <*> 802.1d Ethernet Bridging -
编译内核:
1
make -j8
编译后生成了如下文件:
<linux_kernel_root>/arch/x86/boot/bzImage:用于 qemu 加载的内核文件;<linux_kernel_root>/vmlinux:用于 gdb 调试的文件;
生成 rootfs
-
安装 qemu-system-x86_64(即模拟 x86_64 环境的工具):
1
sudo apt install qemu-system-x86
-
制作 ramdisk 的 rootfs,并且启动内核测试:
1
2
3
4
5
6
7
8
9
10
11
cd linux-5.19.6

# 下载生成 rootfs
git clone https://github.com/wenfh2020/kernel_test.git
cd kernel_test-main/test_epoll_thundering_herd

# make 编译,生成 init 程序
make
# 这个步骤先将 init 打包到 rootfs.img 中
# 然后通过 qemu 启动内核测试程序(先输入 s <回车>,再输入 c <回车> 能显示收到 hello 就算成功)
make rootfs
一些说明:
make rootfs在生成 rootfs 后还会执行 kernel_test-main/in.mk 中写的qemu-system-x86_64 -kernel ../../arch/x86/boot/bzImage -initrd ../rootfs.img指令;- 上面的 qemu 指令默认会开启 gui 界面进行显示,如果不想用 gui 界面可以改写指令为:
qemu-system-x86_64 -kernel ../../arch/x86/boot/bzImage -initrd ../rootfs.img -append "rdinit=/init console=ttyS0" -nographic,退出 qemu 需要先按下 ctrl+a 松开后按下 x;
开始启动内核调试
gdb 调试内核
-
qemu-system-x86_64 调试模式启动内核:
- -append 表示传给 kernel 的 cmdline 参数,其中:
- nokaslr 禁止内核起始地址随机化,使用 gdb 调试必须禁止这个;
- rdinit 指定内核起来后第一个进程,/init 是默认的,根目录默认在 ramfs 中(可通过 root=/dev/mmcblk0 这样的参数更改 mmc 分区为根目录),然后 ramfs 在 qemu 中通过 -initrd 进行指定;
- console 指定调试信息输出的串口,x86_64 上使用 ttyS0,一些 arm 上可能使用 ttyAMA0;
- -s 表示使用 gdbserver 进行调试,端口号 1234;
- -S 表示不自动运行模拟,需要 gdb 连接之后进行操作;
1
2
3
4
5
6
7
cd linux-5.19.6/kernel_test-main

# 使用 gui 运行(建议在 wslg 环境运行)
qemu-system-x86_64 -kernel ../arch/x86/boot/bzImage -initrd rootfs.img -append "nokaslr rdinit=/init console=ttyS0" -S -s

# 使用字符界面运行(禁止图形输出)
qemu-system-x86_64 -kernel ../arch/x86/boot/bzImage -initrd rootfs.img -append "nokaslr rdinit=/init console=ttyS0" -S -s -nographic
- -append 表示传给 kernel 的 cmdline 参数,其中:
-
新开一个终端使用 gdb 命令行方式调试内核:
1
2
3
4
5
6
7
8
9
cd linux-5.19.6

gdb vmlinux
(gdb) target remote :1234
(gdb) b start_kernel
(gdb) b tcp_v4_connect
(gdb) c
(gdb) bt
(gdb) focus
显示效果:
1
2
3
4
5
6
7
8
9
10
11
12
13
14
15
16
17
18
19
20
--Type <RET> for more, q to quit, c to continue without paging--
"Auto-loading safe path" section in the GDB manual.  E.g., run from the shell:
        info "(gdb)Auto-loading safe path"
(gdb) target remote :1234
Remote debugging using :1234
0x000000000000fff0 in exception_stacks ()
(gdb) b start_kernel
Breakpoint 1 at 0xffffffff82fc3c19: file init/main.c, line 930.
(gdb) b tcp_v4_connect
Breakpoint 2 at 0xffffffff81a8ece0: file net/ipv4/tcp_ipv4.c, line 201.
(gdb) c
Continuing.

Breakpoint 1, start_kernel () at init/main.c:930
930     {
(gdb) bt
#0  start_kernel () at init/main.c:930
#1  0xffffffff81000145 in secondary_startup_64 () at arch/x86/kernel/head_64.S:358
#2  0x0000000000000000 in ?? ()
(gdb) focus
vscode+gdb 调试内核
-
qemu-system-x86_64 调试模式启动内核:
1
2
3
4
5
6
7
cd linux-5.19.6/kernel_test-main

# 使用 gui 运行(建议在 wslg 环境运行)
qemu-system-x86_64 -kernel ../arch/x86/boot/bzImage -initrd rootfs.img -append "nokaslr rdinit=/init console=ttyS0" -S -s

# 使用字符界面运行(禁止图形输出)
qemu-system-x86_64 -kernel ../arch/x86/boot/bzImage -initrd rootfs.img -append "nokaslr rdinit=/init console=ttyS0" -S -s -nographic
-
vscode 打开 linux-5.19.6 目录:
1
2
cd linux-5.19.6
code .
-
创建一个调试配置 .vscode/launch.json:
1
2
3
4
5
6
7
8
9
10
11
12
13
14
15
16
17
18
19
20
21
22
23
24
{
    // 使用 IntelliSense 了解相关属性。
    // 悬停以查看现有属性的描述。
    // 欲了解更多信息,请访问: https://go.microsoft.com/fwlink/?linkid=830387
    "version": "0.2.0",
    "configurations": [
        {
            "name": "kernel-debug",
            "type": "cppdbg",
            "request": "launch",
            "miDebuggerServerAddress": "127.0.0.1:1234",
            "program": "${workspaceFolder}/vmlinux",
            "args": [],
            "stopAtEntry": false,
            "cwd": "${workspaceFolder}",
            "environment": [],
            "externalConsole": false,
            "logging": {
                "engineLogging": false
            },
            "MIMode": "gdb",
        }
    ]
}
-
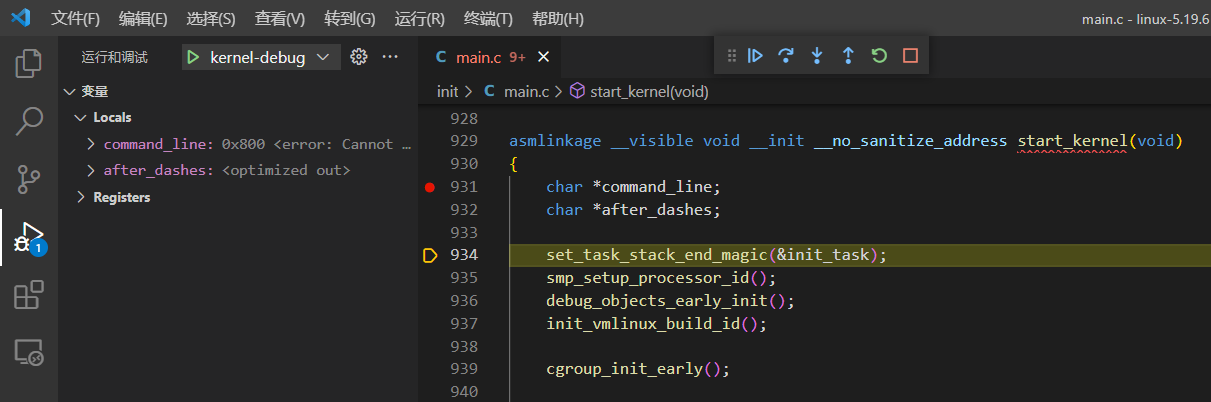
在 init/main.c 中 start_kernel 函数里打个断点,按下 F5 就可以开始调试;